Funny Friday


Organic Veggie Shopping
The other day, it was my turn to prepare dinner, so I asked my wife to go over to the local market and buy some organic vegetables.
She came back rather upset. When I asked her what was wrong, she said, "I don't think I like that produce guy. I went and looked
around for your organic vegetables and I couldn't find any. So I asked him where the organic vegetables were."
"He didn't know what I was talking about, so I said, 'These vegetables are for my husband. Have they been sprayed with any poisonous chemicals?'"
"And he said, 'No, ma'am. You'll have to do that yourself.'"

Eating To Live


  Have you ever asked yourself: Do I live to eat?  Or do I eat to live?
 I live to eat...but I also eat to live in the same meal.  Like every other mom reading this, I don't have a lot of time to spend in the kitchen preparing home-cooked meals from scratch.  So would you believe it if I told you my kids asked me the other day what a drive - through is and what a happy meal is?

We just celebrated Earth Day and many of us probably explored some new green living options.  It's just as important to live green on the inside of our bodies as on the outside, but how can a busy mom not give in to the once a week or once a month fast food stop?  Or keep school lunches packed quickly and nutritiously?  Or feed "starving" kids now during a long errand run?

Over the past 11 years, as I have studied food and health I have asked these same questions again and again.  The most important factor to being successful with healthy eating is to be 100% commited to avoiding the places, foods and ingredients that you know to be unhealthy or dangerous.  Now, with this 100% commitment in place, let's look quickly at a couple tips and tricks even the busiest mom can use.  I will add more in future articles.

1. The time spent in a drive - through could be used before leaving the house to prepare a fast snack.

  • chop up carrot sticks or your child's favorite veggie or fruit.
  • throw a handful of nuts and rasins and pretzels into a baggie (or buy premade trail mix)
  • make "Energy Balls" using nut butter, honey and powdered milk as a base, and add whatever you want to that!  Store them in the fridge and pull some out as needed.
  • my favorite: stash energy bars or healthy packaged snacks in your purse, diaper bag or car.
2. Smoothies are the perfect way to pack in the nutrients under a time crunch.  We keep a supply of frozen fruit handy, and I try to never be without avocados.  If you haven't heard of avocado in smoothie before, you might think it sounds strange or even yucky, but give it a try!  Avocado is virtually bland and tasteless, so it merely adds a rich creamy texture to your smoothie.  Not to mention the essential fatty acids and other good stuff avocados boast of!  I've successfully used smoothies to give my young children supplements they needed that were in capsules by just breaking open the capsule and pouring it into the mixture.

I'd love to share some recipes with you soon!
Thanks for reading.  :)
A hui hou,
Anna Hakes
Lilia Designs
Go With The Flo Pads

Wordless Wednesday


Photobucket

Grilled Artichoke


 It's both artichoke and grilling season! Grilled artichoke gives you the delicious taste of artichoke with a little smokey flavor from the grill. It's so easy, the artichokes can be prepared the day before and grilled before serving. Prepping artichokes is easy and quick once you get the first one done.

Four Artichokes
Lemon or lime slices
2 bay leaves
2 garlic cloves
1 tsp black pepercorns
1/2 tsp kosher salt
a few sprigs of fresh parsley
for the grill-
olive oil
salt
pepper
1/2 of a lemon or lime
To prep the artichoke hold it firmly and slice off about 1/3 of the top with a serrated knife, it will go through the leaves easier than a chef's knife.
Snip off the pointy ends of the leaves with kitchen shears. If there are a lot of tough outer leaves pull them off.
All done with the top.
Cut off the bottom stem. Up to the base.

Make sure you have a pot and steamer basket these will fit into.
Place the bay leaves, lime/lemon slices, garlic, salt, pepper and parsley in the pot. Add water, enough to steam not to cover the artichokes. Insert the steamer basket and put the artichokes on top. Cover and steam for 25-30 minutes, depending on the size of your artichokes.

To test if it's done use a skewer or paring knife to pierce the bottom of the artichoke it should go through fairly easily.

At this point you can cover these with plastic wrap or put them in a container for a day and grill them later, or eat them like this.
To grill cut the artichokes in half, from the bottom side. I find you lose less leaves and it stays together better than cutting from the top.

Remove the fuzzy choke with a paring knife or spoon.
Brush the cut sides with olive oil. Salt and pepper then squeeze fresh lime/lemon juice on top. Grill these cut side down 5-7 minutes. Just until heated, if they are getting too dark/burned move them to a warming part of the grill.
That's it. Serve with melted herbed butter.


Featured Artisan - Buff Organics

Today we welcome Christa of Buff Organics


Here is what she has to say about herself and her business - 

I strive to create natural and organic bath and body products that are good for you, your family, and our Earth. I craft Buff Organics' products using top-quality ingredients that are sourced from environmentally responsible companies. My goal is to support sustainable, organic agriculture, while providing families with natural and luxurious bath and body products that are eco-friendly. 

We also had a few of our mamas ask her questions - and you can find those below.

How did you get into making bath and body items? 

I have always been interested in organic and natural items... from cleaning, to bath and body, to fabrics, to food. After all of my research to provide my family with the green alternatives, I finally decided to branch into making items myself. I actually began making my own cleaning products, and next, I began researching and using essential oils. I love to research, experiment, and create, and my passion for the subject matter really drove me. I perfected my formulas after countless experiments and numerous testers passed out to family and friends. Then, we all agreed- we loved the products too much not to share! 


What is your favorite item from your line and why? 

That's a tough one. I am constantly changing my favorite, and it really varies with the season. But I really love the Luxury SPA Salt Bars! Another favorite is the Sugar Scrub Cream. I've never used a shower product that moisturizes so well that you really don't even need a lotion afterward. Plus, I'm a huge fan og cold-process soap


What is your favorite scent/scent combination? 

I really can't choose just one! My favorite anytime scent is Clean Rain, an essential oil combination with Lavender and Bergamot. I also love Yuzu and Champagne! For earthy scents, my favorite is Karma, since it has lots of Patchouli and Sweet Orange. 

Is there something you have always wanted to make but haven't had the time? 

There is always something on my list that is waiting to be created. I'm working on a Bug Spray for Summer, and I've always wanted to create a natural deodorant. Other products that are in the works are Shampoos and Conditioners, Linen/Body Mist, and numerous different Soaps! 


Now it's your turn.
Giveaway time!


How to Enter:  
Mandatory entry:

♥ Visit Buff Organics and leave a comment here listing you favorite item.

Additional entries:

♥ Tweet this giveaway and leave a comment saying you did so
♥ Blog this giveaway and leave the link in the comments
♥ Follow the team blog and leave a comment saying you are a follower (if you already are, leave a comment saying that!)
♥ Fan the team on facebook and leave a comment saying you did (if you are already a fan, leave a comment telling us!)
♥ Fan Buff Organics on Facebook and leave a comment saying you did (if you are already a fan, leave a comment telling us!)

Good luck!


And the winner is ...

Random Integer Generator

Here are your random numbers:
13
Timestamp: 2010-05-03 14:43:49 UTC

We will be in touch with you shortly! 

Friday Funny: Wreck a Cake

I can't get this out of my head! If you have never seen Cake Wrecks, you have to check it out!


submitted by Holden's Landing

Wordless Wednesday


Tuesday Tutorial: Mini Greenhouses

Can you feel it? The air is getting warmer ... the days getting just a little longer ... I am itching for gorgeous weather - and hoping to have some sort of garden this year. My kids have been planting herb seeds for the past few days to grow on our windowsill.


If your little garden gnomes are like mine, they will be itching to start their gardens long before the weather is warm enough to start them outside. The solution? Mini make-shift greenhouses that take up no extra room in your house!


To make each mini greenhouse you will need soil, seeds, masking tape or packing tape, and a ziplock baggie. Fill the bottom of the baggie with soil (not too much or the greenhouse will be too heavy), plant a seed or 2, mist with a plant mister, tape the top portion of the baggie to a sunny window (be sure that the bag can still be opened and closed when you are taping the top, only tape the back of the bag to the window), and zip it closed. Beans are a great choice for this greenhouse, because they grow quickly and they will grow up and out of the bag very nicely. Your child will be able to watch as the seed sprouts, see the root system and the shoot and watch it grow quickly. You will be able to observe the water cycle as well … the wet soil causes condensation on the baggie which will “rain” down back onto the soil. If the soils starts to dry out, mist again with the plant mister. Once the plant starts bumping against the bag closure, unzip it and let the plant grow up and out of its greenhouse!

From Earth*School, Gnomes in the Garden
Copyright 2004-2010, Bonnie Elizabeth Vontz/Earth*School

K&F Shops

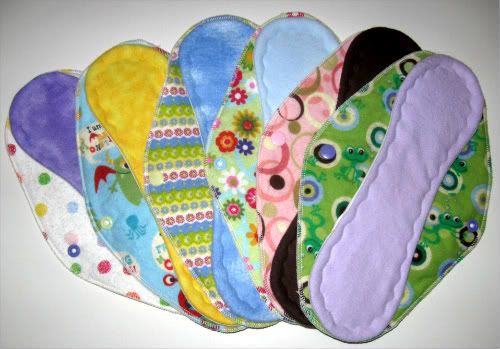
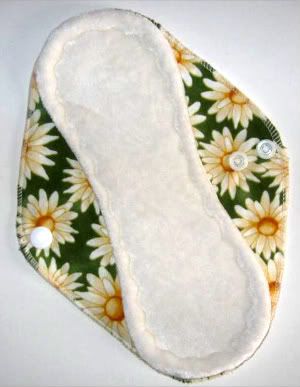
Featured Artist: Blossom Pads


How did you first start your business?
I started sewing cloth diapers about 8 years ago, to add to our cloth diaper stash. With a large family, cloth diapering was not only a green way to go, but also a frugal option. With the encouragement of family and friends I decided to try selling online and opened up Bellies, Babies 'n More in 2007. In 2009, Blossom Pads officially opened and has been growing ever since. 


What is your favorite item you've created and why?
Some of my favorite items are the cloth pads that I have made for young ladies, many as young as 10. When I hear back about how happy they were when they got their pad packages in the mail, it really brightens my day! I send those packages hoping that the fun prints that they find inside will make "that time of the month" a bit easier to handle...especially at such a young age.


You have two different business names...are you changing to Blossom from Babies Bellies n more?
When I first started Bellies, Babies 'n More, I was offering cloth diapers, fleece diaper covers and diapering accessories. In the past year, I felt that I needed a change, but wanted to continue making natural family products. I had been selling mama cloth off and on for a while and really enjoyed working on something special for women wanting reusable options to disposable pads. So, I decided to open up Blossom and see if I was ready to leave Bellies, Babies 'n More. This spring I made the tough decision to close the diaper end of my business and focus strictly on Blossom. I have been very happy with my choice and excited to be directing my attention on expanding and offering new products at Blossom Pads.


What is your favorite thing about your business?
I love the fact that I can work from home surrounded by my family. My husband and I have six children, ages 17 to 2, that we homeschool. Working for myself allows me to spend the day dissecting owl pellets, going on hikes or working with my husband while devoting my evenings to Blossom. We are a very close family, and although it may be difficult and a bit crazy at times, I cannot imagine working anywhere else.

Friday Funny: Evolution of Dance

Wordless Wednesday


submitted by K&F Shops

Tuesday Tutorial~~ April Showers, and what to do with your toddlers when it rains!

April showers bring May flowers, but they also cause cabin fever when stuck in the house with active little ones! Here are a few ideas for indoor activities that will get you through a rainy day, maybe even with your sanity intact!

Build a fort. Where? How? It can be as easy as throwing a sheet or two over the dining room table. Give your child a flashlight to use for their new "house" and it adds to the adventure. If the table is large enough you can even put an empty laundry basket down there for the "bed". Don't forget pillows.
** Mama hint: Take the sheets off the beds for this activity, and while they are busy, put clean sheets on the bed you stripped. If you finish before the magic wears off, sit with your feet up and have a cuppa java, or tea, or your  beverage of choice. You have to remember to take care of yourself for a few minutes each day.
The above activity is good for anywhere from 10 minutes to an all day project.

Send them on a treasure hunt.  Got a bunch of annoying plastic Easter eggs leftover? How about a sea shell collection? Amy men? Barbie accessories? Okay, then pennies or change, you surely have that! Whatever you decide, just take a walk through the house and hide them in strategic locations. Be sure to count how many items you have hidden so you can let them know when the game is done. If you have multiple little people doing this you can give awards to the winner(s) Better have more than one winner unless you like tears and tantrums. How about 1. Most found. 2. Trickiest hiding place finder 3. Happiest hunter.  That should cover the bases. The reward? Hmm. How about the winners get to take turns hiding the objects and letting the others find them. This can possibly turn into a "for next loop" type of game to Mom's advantage.
**Mama hint: Did you have your tea? Coffee? Take another break and do the crossword puzzle, or read the funnies. Extra points if you can listen to Mom music too. (No Raffi, this is your time!)
This activity is good for maybe only five minutes, but a savvy Mom can work it and make it last up to 45 minutes or more.

Get them moving. Okay, don't shoot me, but this one involves exercise, even for them Mom. Dust off one of those exercise DVD's your Mom gave you, or that you bought, or just find an exercise on demand station on the telly. Everyone get in their comfy clothes and plop down and do the exercise routine together. Your best bet is to pretend like they are at a real exercise class to get in the mood. Chances are, they won't do an entire DVD with you, but if they do 10-15 minutes, that's pretty good. The best part is that you can all feel like you did something positive for your bodies. This activity is good for about 10-20 minutes tops, unless you are somehow related to Richard Simmons.
**Mama hint: Make everyone, including yourself fruit smoothies for a reward after this activity.

Pretend Chef's Day. Got a play kitchen? If so, take all the play food and pretend gadgets and replace them with the real deal. No, not your blender or butcher knives, but look around, you have plenty of safe cool kitchen items that you can put in. How about the whisk, or real measuring cups, plastic of course. Wooden spoons, plastic mixing bowls and muffin tins round out the mix. Be sure to add some of those paper muffin tin liners for them too. That's a time killer when they start trying to put them in the muffin tins for you. The really cool things come from the pantry though. Hear me out.. give them dried beans, or pasta, and even rice.Of course use your best judgment when it comes to age appropriate items.  If you have any lunch sized paper bags you can even make chefs hats by rolling up the bottom and putting them on their heads. Add one of your aprons and they are transformed. Never mind about a bit of a mess, it will all tidy up later, and it will be more than worth it when they come to you with a new "recipe" for you to try.. watch their faces as you crunch down on dried pasta while saying "mmmm, yum"  Oh, and if you don't have a play kitchen, draw a "burner" on a piece of cardboard, or paper, tape it to a flat surface and you have a stove. Trust me, they will imagine the rest of the kitchen.

This activity could last for weeks and weeks. An unintended side affect may be that they love having real kitchen stuff so much, that next time you need that whisk, you will have to borrow it from your child.
**Mama hint: If you are a truly no holds barred Mom feel free to give them water to put in a pitcher to mix their concoctions. While they are "cooking" for you, take this time to make a real honest to goodness yummy lunch for yourself. Don't eat too much though, remember you have some dried rice to chew on later.. 


Well, that's all for today, I think I hear the dog chewing on some dried bow tie pasta.  Gotta go.

Featured Artisan - Tiffany of Fair Trade Family

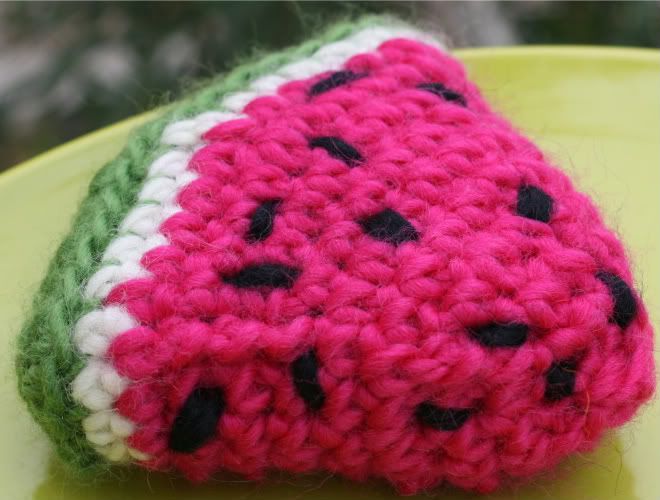
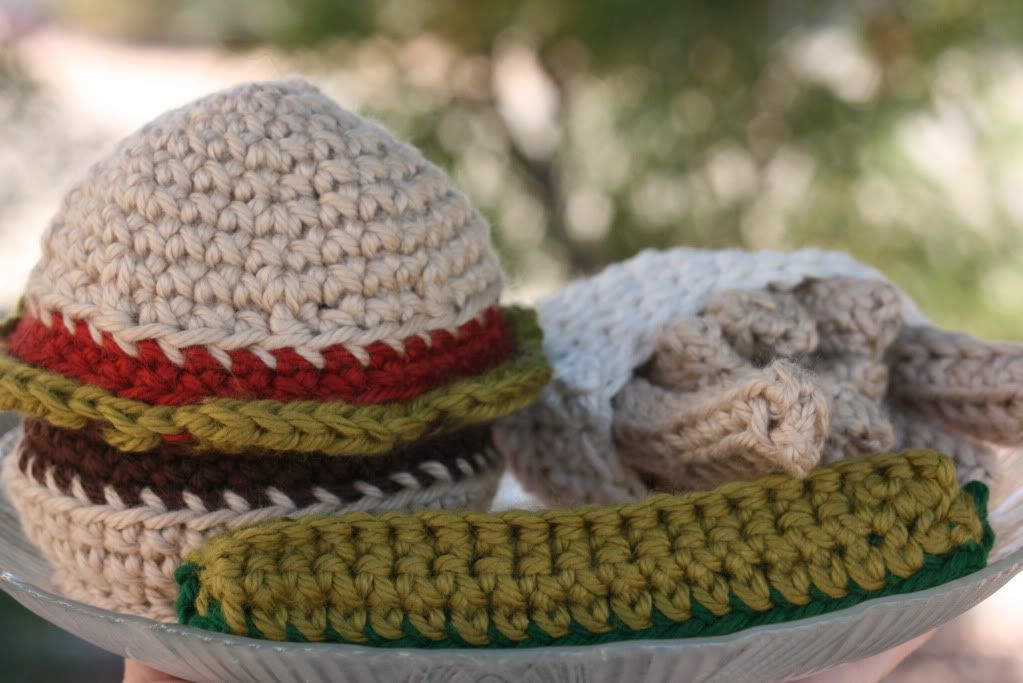
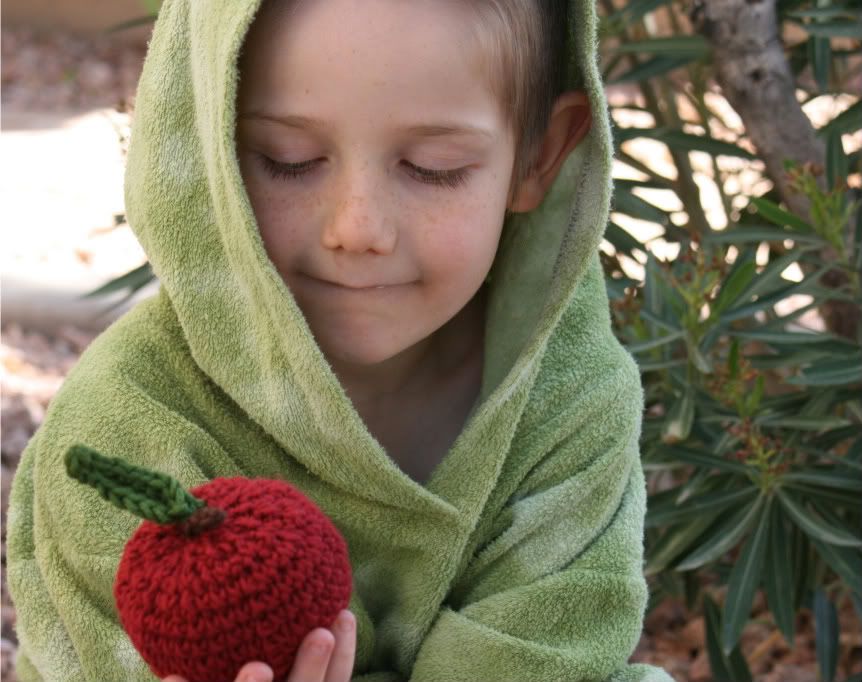
This week's featured artisan is Tiffany of Fair Trade Family.   Tiffany creates amazing wool and cotton play foods for children and many other things!


You make a great variety of items - which is your favorite?
Tiffany:  The item that makes me the happiest to make is the peeling banana and the cupcakes with swappable frosting because I know they make kids smile. That, in itself, makes it very worth it. I love the finished look of my espressos con panna and anytime I make a whole farmer's market set of unusual veggies I am excited.

What is your favorite medium to work with?
Tiffany:  While I am thrilled to offer vegan items out of cotton, I love working with fuzzy earthy wool, especially Peace Fleece, since the company has a focus on establishing cooperatives between war-torn nations. I also love bamboo and any variegated sock yarn when I have the occasion to work with either for a special order.


What was the first crafty item you can remember making?
Tiffany:  I learned, like most children I know who crochet, how to make squares and then little blankets. I really liked making diaper covers and longies but I like shorter term projects that are more about instant gratification. I love food, especially healthy food, but I never thought I would be making toy foods in the mass quantities I do now.

What does a typical day look like?
Tiffany:  Usually, I begin most days with a spinach-fruit smoothie, fair trade coffee, and breakfast with the kids; a 60-90 minute workout at the gym with my 12yo son (the oldest of my four boys); a day of virtual schooling; church and family time in the evening; and whenever my husband starts his hangout time with the kids or bedtime routines I get crafting. Rarely am I without my projects as we go through the school day and activities. My husband and I also love spending time with friends whether it means babysitting for a young couple, opening our home for parties and events, or having single people over for home-cooked meals. I also love coaching soccer and finishing last in half-marathons (lol).


Where did you learn to crochet?
Tiffany:  While my mother was an avid crocheter, she was a busy single parent and was working and going to community college. A neighbor actually showed me how to make those first stitches. And a childhood friend and I dreamed from ages 9-15 of having a store where we sold our (then super hideously made) crocheted goodies. I am naturally stubborn though so I worked determined to be good at it. I still (after thousands of pieces sold) count every stitch in every row of every apple to make sure they are perfect. It is worth the effort, but feels a little crazy sometimes.


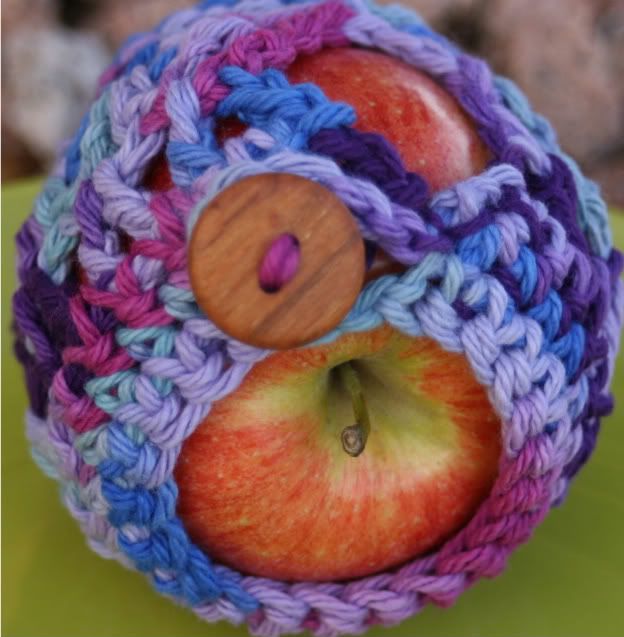
Are you ready for a  giveaway??  Enter for your chance to win a custom apple jacket and a piece of cotton produce!

How to Enter: 
Mandatory entry:
♥ Visit Fair Trade Family and leave a comment here telling you favorite item

Additional entries:
♥ Tweet this giveaway and leave a comment saying you did so
♥ Blog this giveaway and leave the link in the comments
♥ Follow the team blog and leave a comment saying you are a follower (if you already are, leave a comment saying that!)
♥ Fan the team on facebook and leave a comment saying you did (if you are already a fan, leave a comment telling us!)
♥ Fan Fair Trade Family on facebook and leave a comment saying you did (if you are already a fan, leave a comment telling us!)

* Congrats to comment #29 Cabootique, our winner! 

Friday Funny: Mom's New Recipe

Mom's new recipe
Mom's Brownies Recipe

Remove teddy bear from oven and preheat oven to 375.

Melt 1 cup margarine in saucepan.

Remove teddy bear from oven and tell Jr "no, no."

Add margarine to 2 cups sugar. Take shortening can away from Jr. and clean cupboards.

Measure 1/3 cup cocoa.

Take shortening can away from Jr. again and bathe cat.

Apply antiseptic and bandages to scratches sustained while removing shortening from cat's tail.

Assemble 4 eggs, 2 tsp. vanilla, and 1-1/2 cups sifted flour.

Take smoldering teddy bear from oven and open all doors and windows for ventilation.

Take telephone away from Billy and assure party on the line the call was a mistake. Call operator and attempt to have direct dialed call removed from bill.

Measure 1 tsp. salt, 1/2 cup nuts and beat all ingredients well.

Let cat out of refrigerator.

Pour mixture into well-greased 9x13-inch pan.

Bake 25 minutes.

Rescue cat and take razor away from Billy. Explain to kids that you have no idea if shaved cats will sunburn. Throw cat outside while there's still time and he's still able to run away.

Frosting

Mix the following in saucepan:

1 cup sugar

1 oz unsweetened chocolate

1/4 cup margarine

Take the darn teddy bear out of the  broiler and throw it away -- far away.

Answer the door and meekly explain to nice policeman that you didn't know Jr had slipped out of the house and was heading for the street. Put Jr in playpen.

Add 1/3 cup milk, dash of salt, and boil, stirring constantly for 2 minutes.

Answer door and apologize to neighbor for Billy having stuck a garden hose in man's front door mail slot. Promise to pay for ruined carpet.

Tie Billy to clothesline.

Remove burned brownies from oven


submitted by Katherine, Love Abounds

Thursday's Spotlight on ... Composting!

My latest project this spring is starting a compost pile in the backyard. I have no excuse to put it off any longer. My father-in-law surprised us last fall with a compost bin. It has been staring at me every day as I get in and out of the car. It's time to get started!
I'm going to share with you the helpful articles I've found online.
http://extension.missouri.edu/publications/displaypub.aspx?p=g6957
How to build a compost bin. Many varieties to choose from.
http://www.grist.org/article/rot-n-roll/
Not only does this article have great information, but it's amusing too! This is a crash course on how to get started and how to keep going.
http://www.compost-info-guide.com/make_better_compost.htm
Top 10 tips for making better compost.
Still not convinced? Here's an article about composting in the city and using very little money!
http://gatheringinlight.com/2007/10/15/how-to-start-a-compost-bin-in-the-city-with-little-money/
So now you have compost. Now what? Here's a great article on what to do with all this nutritious soil conditioner.
http://www.compost-info-guide.com/using_compost.htm
Happy composting!
submitted by Karen, Relic Soap Co

Wordless Wednesday: Beach


submitted by Christa, Buff Organics

Dyeing wool yarn with Kool-Aid

Yarn dye-ing Tutorial 1
1. Soak your 100% wool yarn in a mixture of cool water, a squirt of wool wash or baby shampoo, and a 1/2 cup of white, distilled, vinegar for about 20 minutes. You may need to squish the water through the yarn a little to make sure it is saturated.

All during your dye-ing, make sure you NEVER rub the yarn or wring it. It will felt and stick together, and you will not get the results you want.


Yarn dye-ing Tutorial 2
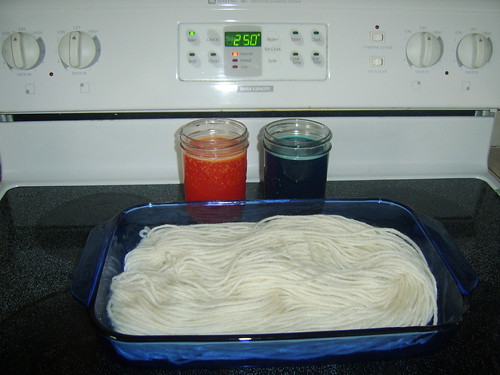
 2. While the yarn soaks, mix up your dye. I use 2 cups water, 1 -2 packets of unsweetened koolaid and 1/8 cup (or two Tablespoons) of vinegar per color. The brighter the color, the more koolaid you want to use.


  Yarn dye-ing Tutorial 3
 3.Squeeze as much water out of your yarn as you can, and lay it out in a glass 9x13 pan. Only one skein per pan, or you won't be able to get good saturation all the way through the yarn.


Yarn dye-ing Tutorial 4
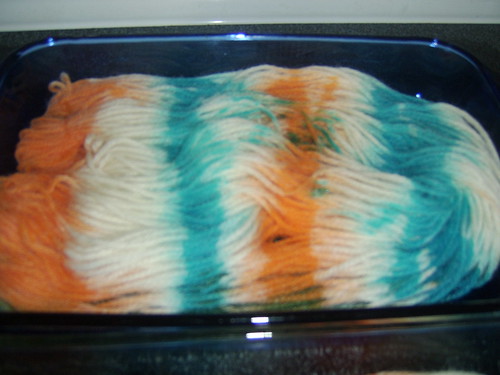
 4.Pour your koolaid dye all over your yarn. You can be as creative or orderly as you want, but since you are using a pan, the dye will mix along the bottom, and you will get some really cool colors.


Yarn dye-ing Tutorial 5
This is the bottom of the pan. See how the color is mixing along the bottom?

5. Cover the pan tightly with tin foil, and place in a preheated 250 degree oven. Set the timer for 30 minutes. Let it bake. When the timer goes off, turn off the oven, and just leave your yarn to cool. After a while (I usually leave it in for a good hour or so) you can take the pan out to finish cooling on top of the stove.


Yarn dye-ing Tutorial 6
6. Hang your yarn to dry (I use my bathtub). If you squeeze enough water out with your hands, you can roll it up in a towel and press out even more water.


Yarn dye-ing Tutorial 8
 
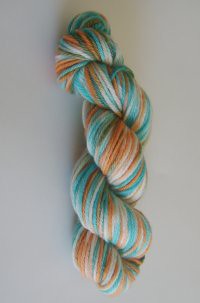
When your yarn is dry, and it has been reskeined (rewound into a new hank) you can see your beautiful results! Happy stitching!
 
Yarn dye-ing Tutorial

Submitted by Shannon of Gillyweeds

April Giveaway - Oh Baby!

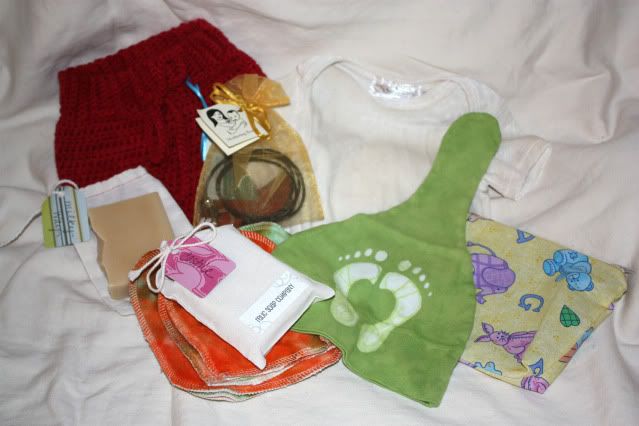
It's time for our April giveaway!  This time around, we are focusing on those cute and snuggly little ones - this prize is just for newborns!


Photobucket


So what do we have here? Let's see ...
From Holden's Landing: set of 6 organic bamboo velour/organic cotton fleece wipes and mits, hand dyed in a gender neutral green/orange colorway (retail value $7.50)


From Gillyweeds:  an adorable small soaker was crocheted by Gillyweeds using the Gillyweeds Top Down Soaker pattern. It's crocheted using 100% wool that has been professionally dyed in a striking semi solid red, perfect for any new baby! It features a roomy bum area, and ribbed waistband, with stretchy leg openings, and a roomy gusset. It measures with a rise of 16 inches, and 18 inch hips. It would fit an infant from 3-6 months. It comes washed, lanolized and ready to wear! (retail value $20)


From My Beautiful Girl:  a luscious natural colored organic bamboo velour short sleeve lap tee in sweet newborn size, pairs perfectly with woolies! (retail value $18)


From Relic Soap Co:  2 bars of baby friendly cold processed artisan soap
Castile - Mildest of the milds. No fragrance, no colorants. Nothing except 100% pure olive oil soap. Our Castile makes an excellent facial soap for dry, sensitive skin. Moms love it for their babies - it rinses away so easily. (Just keep it away from the peepers, please!)

Milky Way - We begin with using fresh goat milk, rich in caprylic acid, which soothes and rejuvenates skin. Creamy milk combined with our perfect balance of oils and you've got a super mild yet cleansing bar. We add absolutely no fragrance to this bar. Great for sensitive skin, especially prone to eczema. (retail value $12)


From Little Gems: Mothering Rocks necklace - Celebrate your style while providing safe exploration for your babies while nursing or being held in slings or in your arms. This Little Gems Mothering Rocks nursing necklace features a Sterling Silver circular pendant proudly endorsing 'Family', strung on an adjustable cotton cord.  The Sterling Silver Pendant measures 2cm in diameter, the same size as a quarter.  (retail value $37)


From Chaco Creations:   a great little pouch for just about anything. Measuring 7 inches x 5.5 inches, this pouch is a great size to hold your knitting tools, change or any of those little things you put in your purse! (retail value $10.50)


From Alphabette Zoope: a cute infant-size hat will keep your little one's head warm and can be knotted or worn without a knot at the top. Batiked with the Heartfeet design and handdyed in gender-neutral greens, this cap should fit from newborn through several months old.(retail value $14)


From Nifty Necessities: a $20 gift certificate


How's that? Over $130 in prizes for one lucky little baby!


How to enter, you ask? Well, read on ...
Mandatory entry:  Search "team hyena" on etsy and post a comment with your favorite item
Additional entries:
* Follow the blog and leave a comment saying you are doing so (already following? Leave a comment letting us know!
* Fan the team on facebook and leave a comment saying you did so (already a fan? Leave a comment letting us know!)
* Tweet, blog, or post the giveaway on facebook and leave a comment with a link
and just for fun, leave a comment with your current favorite baby name for an additional entry!


Giveaway ends Friday, April 9th, and a winner will be announced around noon that day. 

Congratulations to comment #85 - Bug! We will be contacting you shortly! 

Green Gift Giving

written by Shanna of Sweet Slings, llc

As Easter nears it's a great opportunity to consider better alternatives to the plastic baskets, plastic grass, and plastic eggs that fill the box store shelves. Sand pails and dump trucks frequent our house this time of year.  But Easter is just the beginning of a greener gift giving perspective. The joy of giving a gift is rewarding unto itself. The pleasure in thoughtfully pairing and presenting that gift in a loving way makes it doubly so.

The Perfect Pairing

The trash day after Christmas always brings thoughts of empathy for our local waste collector as he drives the streets lined piles of boxes and bulging bags full of wrapping paper. With some forethought and planning, we can reduce our gift giving waste simply by the effort we put into it.

Try packaging a gift within a gift. You could fill a market bag like this one from Gillyweeds with lemon soaps from Daisycakes Soaps.


Or fill these Joyful Earth snack bags with a special treat from Fair Trade Family


Stuff a Wool Coffee Cup cozy from Joyful Earth with a bag of Sakura Bliss Tea from Love Abounds for the  perfect teacher appreciation gift.


The Perfect Packaging

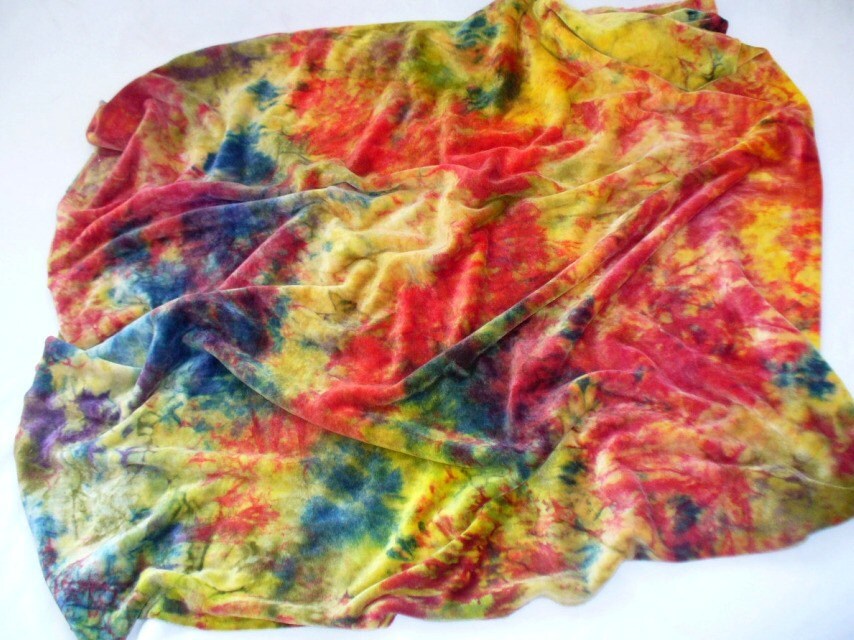
Cloth is a fabulous alternative to wrapping paper. Wrap a baby shower gift in this luxurious velour blanket from My Beautiful Girl.


Treat Baskets like these from Fair Trade Family are a great alternative to the plastic birthday party bags, or sew up simple drawstring bags from fabric scraps.


A fat quarter of fabric (18"x22") and a piece of ribbon is a great substitute for traditional wrapping paper and is a great alternative for those oddly shaped presents.  You can cut the edges with pinking shears for a cute zig zag effect, or simply fold the raw edges under for quick no-sew wrapping.  Remnant bins are fantastic sources of inexpensive fabric options!


Reusing comic strips or having the kids paint or color sheets of crafting paper are still more thoughtful wrapping solutions.  Whatever alternative you decide to use, consider the packaging as much a gift as the gift itself.